Hey everybody !!!
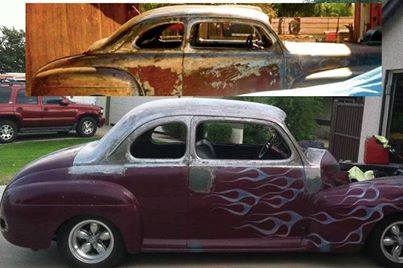
Earlier this week we rough shaped and tacked up the drip rail fix, (3/8th” rod) as you can see in the picture on the left which also shows Jim’s Mercury un-chopped .
I guess I’m getting a little ahead of myself… A little about the chop for those who want to know. We cut 2 3/4″ on the front and 3 1/4″ in the rear for a net 3″ at the b-pillar. Slid the roof forward, leaned the a pillars (in & out) and the b-pillars (forward) to accommodate the cuts/style. We cut an inch out of the rear glass opening, leaned it forward to remove some of the “hump” in the roof. This left about a 6 “gap that we shaped a filler for and installed.
Today we finished configuring the right side drip rail replacement, fine tuned the lines/ends, welded it up and ground it down so that its ready for slinging some lead when we complete the other side =D
We have added a short video where you can see the work completed today below =D
[su_youtube_advanced url=”https://www.youtube.com/watch?v=6WjEpvRzTPA” modestbranding=”yes”]https://www.youtube.com/watch?v=hQtBJmtQXgQ[/su_youtube_advanced]If you have any questions or comments, please feel free to add them below or contact us at 951/8475692
Thanks for hanging at Customikes!!

